For background on how to build searches in RT, please refer to the Query Builder Documentation.
Introduction
Because the Query Builder is the place in RT that allows you to bring together collections of tickets based on set criteria, it is also the heart of reporting in RT, as you can set RT to put together a saved search that can appear in a dashboard. You can also be notified of its results on whatever time interval you choose.
Example
Let's dive into a example that hits close to home for us. At Best Practical, the project manager needs to know the status of customer projects and releases. Let's figure out the rate of bugs generated between minor releases in the 4.2 series. Our users write about bugs they find in RT into Best Practical's RT instance, which creates a ticket. Thus, we'll be searching for Created tickets in the queue appropriately called "RT".
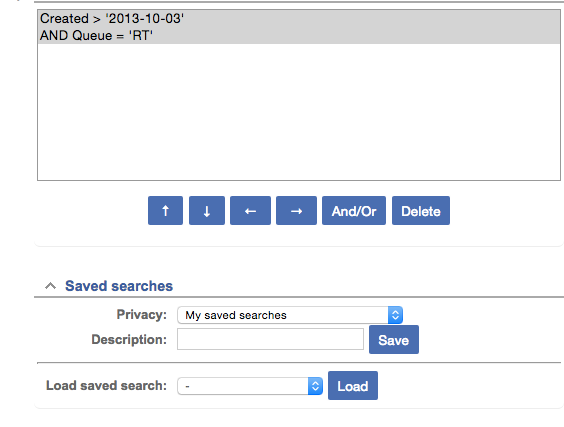
First we need to build these searches, which draw upon the definitions and explanations listed in the Definitions of Ticket Metadata Documentation. Thankfully, we already know that we're focusing on only one queue: RT. I can find the dates for each of the minor releases on the RT page at our website: https://bestpractical.com/rt/. If you go to the bottom left and click on 'Release Notes', you will get a list of each release, minor and major, of RT. Clicking on the 4.2.0 link, you will see that it was released 10/03/2013. 4.2.1 was released on 11/13/2013. So, the first range that I'll be working with is 10/03/2013 through 11/13/2013.
Press 'Add These Terms' to get what we have into the 'Current Search' box:
To get the upper limit into this search, you need to go back to the criteria and look for tickets that were created before 11/13/2013, and add this piece of information to the search by clicking 'Add these terms' again.
The 'Current Search' box should now look like this:

Huzzah! Before we tell RT to retrieve results, we first want to make sure that this search is saved. That way we can use it to build our dashboard later on. Right below the Current Search tab is the "Saved searches" panel. First you must choose what group is allowed access to this saved search. Most times you'll be able to put the search into My Saved Searches, but if you want other people to see it (maybe your manager or teammates), you should choose a group that you and whoever else should see this search have in common. How users are grouped in RT depends completely on the way your organization uses RT, so group names are unique to every RT instance. In this case, I'm going to use "RT hacker's Saved Searches", because I want our engineers to be able to use this search.
Then you need to name your search. 'Bugs Created between 4.2.0 and 4.2.1' is straightforward enough.
Hit the "Save" button, and then "Add these terms and search" so we can see what this search turns up.
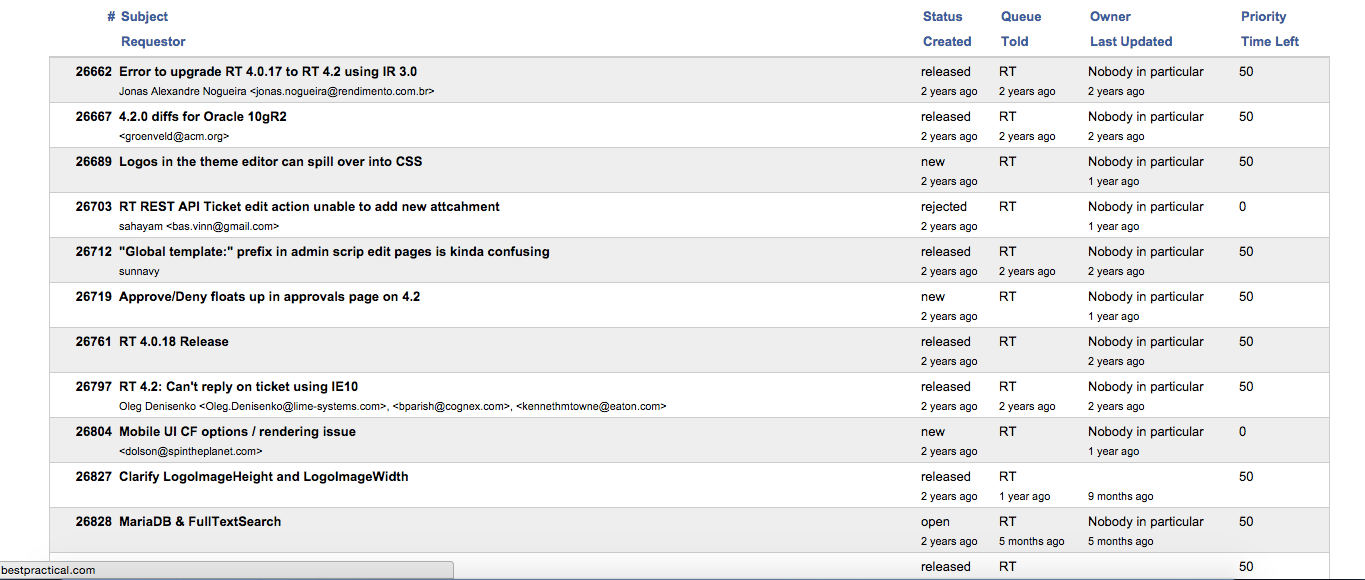
35 tickets were created between 10/3/13 and 11/13/13. We can set this search aside for now and retrieve it later on when we're building the dashboard.
For the sake of this exercise, let's only do two more searches, even though there plenty more minor versions of 4.2. So, I'll also do a search between 4.2.1 and 4.2.2, and 4.2.2 and 4.3.2, and save them like I did the one above.
I'd also like to add a more general search for tickets in the RT queue that have been resolved in the past six months. For this search, let's say it's June 15th, 2015. Six months ago was December 15th, 2014. So, we need to tell RT to look for tickets in the RT queue that were resolved from December 15th of 2014 and onward:
This search will get us what we need, but only for today. I want this search to always turn up tickets that have been resolved in the past 6 months any day that I choose to view this search. To adjust the search, I need to go to the "Advanced" tab at the top right of the Query Build page. You should get to a page that looks like this:
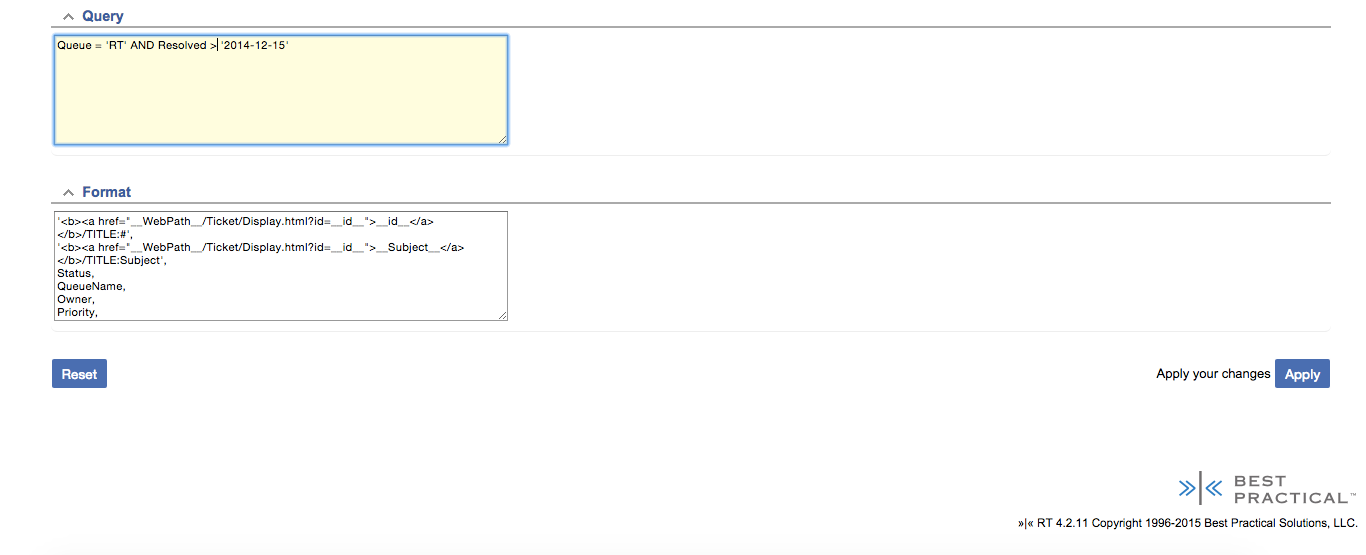
In the top 'Query' box, notice that we've instructed RT to search 'Resolved > '2014-12-15'. This means 'find tickets resolved after (dates greater than) December 15th, 2015'. To make this a moving range instead of a fixed date, replace '2014-12-15' with '180 days ago', and click 'Apply' in the lower right hand corner.
Note that you can manipulate the content of searched for tickets using this form of mathematical notation. If I were to change the search to 'Resolved < 2014-12-15', I would get all tickets in the RT queue that were resolved before December 15th, 2014, which would be a lot of tickets! using the =, I would get any tickets resolved on that day. When you combine < or > with an =, e.g. Resolved >= '2014-12-15, you get all tickets resolved after that day and tickets that were resolved that day, which means that only using < and > in searches is exclusive of the day that you choose.
Another way to manipulate searches is to use the arrows underneath the Current Search box in the Query Builder:
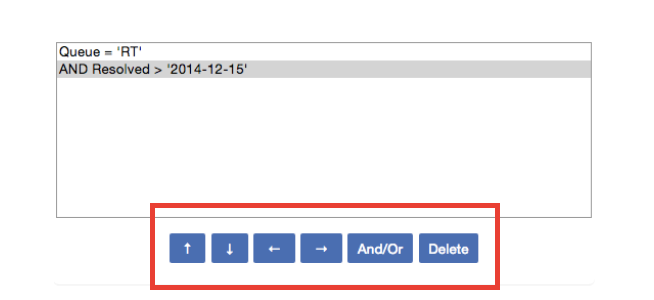
These arrows are useful for relatively complicated searches that include clauses that are bracketed by parentheses. Take the below search:
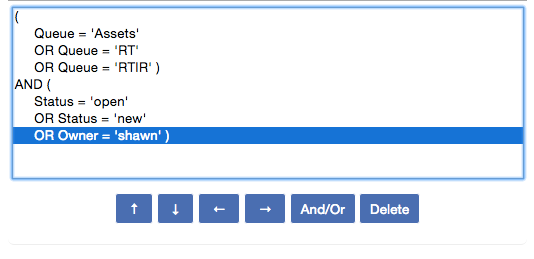
This search will produce tickets in the Asset, RT, or RTIR queues that are also either open, new, or are owned by Shawn. This search yields 422 tickets. Now I want to find out what happens when I move 'Owner = Shawn' to the first clause. Highlight the line where the criterion appears that you want to move, and click the arrow that corresponds to the direction you want it to go, here up. Once 'Owner = Shawn' is above the AND, this search will now yield tickets in the three queues, or owned by Shawn, which could be in a queue other than either of those three, that meet either status criteria. This search yields 362 tickets.
Now that we have all of our searches and knowledge of how to adjust them, it's time to compose a dashboard that will show the results of each of these searches any time you navigate to it.
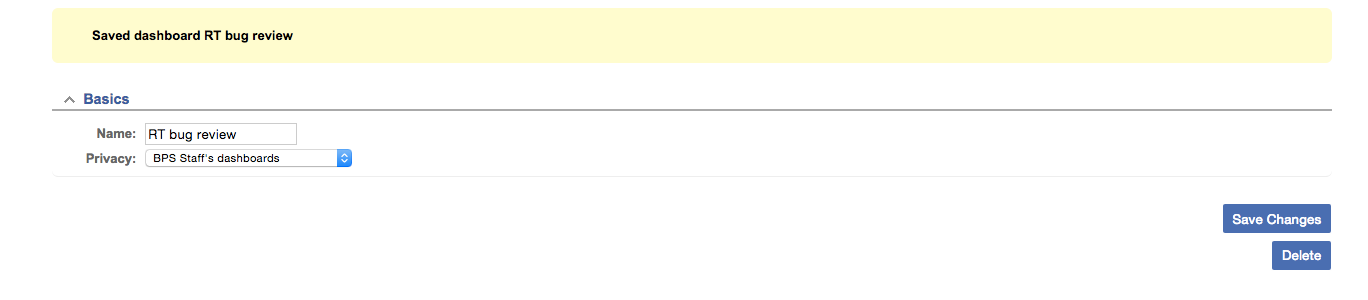
First, we need to create the dashboard, then we will populate it with the searches we created. Hover over the 'Home' menu and select 'New Dashboard'. In the next screen, you'll be prompted for a name. I want to call this one 'RT bug review'. In the drop down menu below the text field, make sure to select the appropriate level of accessibility (just like you did for your saved searches). In this instance, it's 'RT hacker's dashboards'. Hit 'Create'!
The next screen you'll see has four menus in the top right hand corner: Basics, Content, Subscription, and Show.
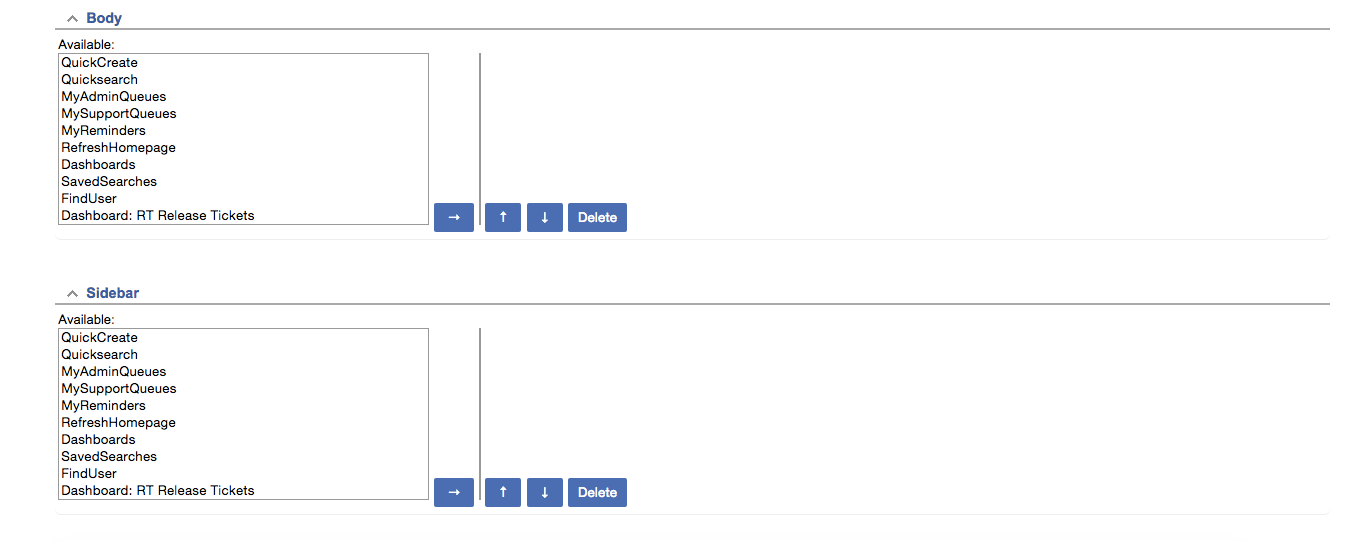
To populate the dashboard with the searches we created, click on 'Content'. You'll be brought to a screen that looks like this:
Scroll through the Available searches. The searches we've created are all the way at the bottom. You can only add one search at a time, so highlight one search and click the arrow pointing to the right of the screen. After you've selected and added each search, the box to the right of the 'Body' box should look something like this, depending on the order you've added them.
Now click 'Show' in the upper right hand corner. You'll see each search presented. There's your report!
You can change the overall order of the searches. Click on Content in the upper right hand corner, same as we did to add the saved searches. In the right most Body content box, where the saved searches we included on the dashboard are listed, highlight any one of the searches, and use the up and down arrows to push the highlighted search either up or down in the order. You can also delete searches from the dashboard if you so choose.
← Back to index