Introduction
This is a basic tutorial for setting up asset tracking in RT using the Assets functionality. At the end, you'll have a basic configuration that lets you add assets, search for them, link them to tickets, etc.
You can follow along with the tutorial and try setting things up yourself to get a feel for all of the administrative controls. If you want to get a jump start, the files to set up this basic configuration are provided in the docs/customizing/assets directory.
To load the test catalog, custom fields, and users, run the following from your RT directory:
    sbin/rt-setup-database --action insert --datafile \
      docs/customizing/assets/tutorialdata
This will change the default catalog name, create some users, and give those users asset permissions. Only asset rights are granted, so you need to grant additional rights if you want to experiment with creating tickets and linking assets. The initial user passwords are 'password'. You should only run this on a test RT instance, as it is not intended to be used for configuring a production system.
Getting Started
There are a few configuration options you might set before starting. Assets offers a $DefaultCatalog feature that works similar to RT's DefaultQueue, but you can probably skip it for now since you only have the one catalog so far.
More interesting are some optional portlets you can activate to add asset data to RT's pages. MyAssets and FindAsset portlets are available for placement on RT at a Glance or in dashboards and a UserAssets portlet is available for the user summary pages.
These portlets are fairly self-explanatory and for reference you can find them in $HomepageComponents and @UserSummaryPortlets respectively in RT_Config.pm. Note that $HomepageComponents makes the portlets available, but doesn't put them on RT at a Glance. To add them, just click the Edit link on the upper right-hand corner of the homepage. @UserSummaryPortlets does automatically add the "Assigned Assets" portlet to the User Summary page. It will appear based on the position in the configuration, so to move it rearrange the list to where you want it to appear.
If you've made any configuration changes, restart your server and you're ready to go.
Catalogs
For the initial configuration, we'll log in as RT's root user so we have full rights on the asset configuration. You could also create an "Asset Admin" group and assign appropriate rights to allow other users to manage catalogs.
When you log in you'll see a new Assets menu, but before looking there we need to look at catalogs and some other configuration. Catalogs are to assets what queues are to tickets, so if you've used RT, the relationship should be fairly familiar. Similar to the General queue, a "General assets" catalog is provided to get you started. You can see it at Admin → Assets → Catalogs.
We're going to use the default, but change it to a name more appropriate for our use. Clicking on the asset name brings us to the catalog edit page and we can update the name to "IT Department Assets". You can update the description if you like as well.
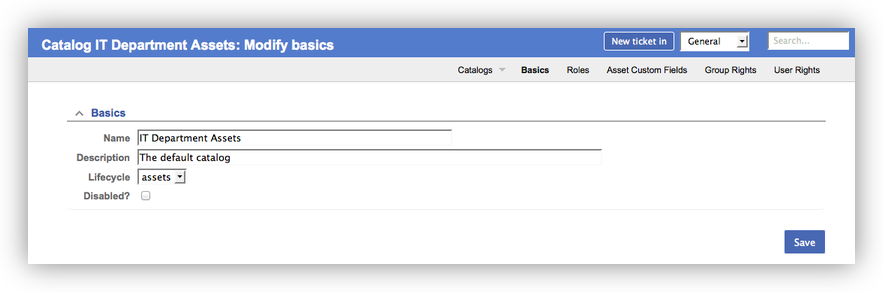
You'll also notice that catalogs have a lifecycle just like queues. Request tracker is installed with a default assets lifecycle, but just like queues you can create new ones with custom statuses and other configuration to allow RT to reflect the states of your assets.
You can find the asset lifecycle in the RT_Config.pm file in your RT installation. The initial statuses are new, allocated, in-use, recycled, stolen, and deleted. Depending on your process, you might add new ones like surplussed, donated, or in-repair. To create a new asset lifecycle, just copy the default into RT_SiteConfig.pm, replace the top-level "assets" key with a new name, and make your changes.
Asset Custom Fields
Next we need to create some custom fields to hold our asset metadata. You can find asset custom fields at Admin → Assets → Custom Fields and they work just like custom fields for other RT objects.

Request Tracker will automatically provide some core values for your assets. Each asset can have a Name and Description and, like tickets, they have statuses based on the lifecycle configuration. You can use Name and Description however you want and they are not required. However, many of the asset pages use these fields so it's best to provide a descriptive name to make it easy for people working in RT to identify the asset quickly. The manufacturer's product name can be convenient (e.g., '15" Macbook Pro').
Assets come with three user fields you can associate with an asset: Owner, Held By, and Contact. These are provided to cover different types of assets, from laptops to servers to software, and different asset management situations. Owner can hold the user who bought the asset, maybe the head of the department where the budget came from. Held by is who the asset is assigned to. Laptops are assigned to a user and servers might be held (or managed) by the system administrators. Contact can be used to set a manager who might need to know about needed system updates or equipment with expiring support. Like tickets, these roles give you places to attach rights, so use them however they work best for you.
Any other information you want to track will need custom fields. We'll start with a few basic fields:
Serial Number (enter one value)
The serial number from the asset.
Tracking Number (enter one value)
An internal tracking number. RT will assign an asset ID as well, but you may have other systems to integrate with or already have a way to assign asset ids for accounting purposes.
Manufacturer (dropdown)
Company that made the asset.
Type (dropdown)
Is it a laptop, server, or cell phone?
Issue Date (date)
When the asset was given to the owner (or held by) person.
Assets keep a transaction history like tickets, so you may be able pull this information from the "owner set to X" transaction. Creating a separate field makes it easier to report on.
Support Expiration (date)
When the current support contract expires.
Custom Field Grouping
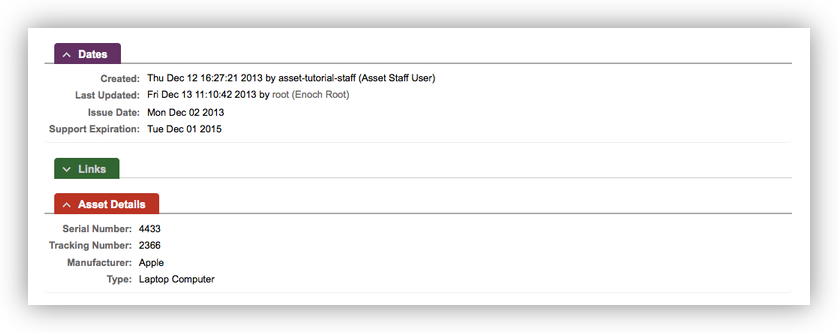
Any custom fields you create will be displayed on the asset display page in a default "Custom Fields" section. That may be sufficient, but assets also supports RT's custom field grouping feature, so we can group together some similar custom fields and give them a custom name. If we add the following to RT_SiteConfig.pm:
    Set(%CustomFieldGroupings,
        'RT::Asset' => {
            'Asset Details' => ['Serial Number', 'Manufacturer', 'Type', 'Tracking Number'],
            'Dates'         => ['Support Expiration', 'Issue Date'],
        },
    );
and restart RT, the dates will be tacked on the end of the Dates portlet and we get an Asset Details label on the other custom fields.
Asset Rights
Now we've got the basic configuration in place to start recording asset data. Next we need to assign some rights so people can view and edit asset information. Our staff are all privileged users so we'll grant all view and modify rights on our catalog to the Privileged role. We'll also include rights to view and modify the catalog's custom fields, although you could set these rights individually on each custom field if you wanted to allow users to see some but not others.
Similar to queues, you can set rights at the catalog level. Go to Admin → Assets → Catalogs and click on the catalog you want to edit. Click Group Rights in the submenu to assign asset rights to groups like the system Privileged group.

We also want unprivileged users to be able to see their own assets to make it easier to submit support requests. To give them just the Name and Description on their own assets, we can grant SeeAssets and SeeCatalogs on the catalog to the Held By role.
All of the asset rights are described in the Assets documentation. You can get much more detailed and fine-grained than this example, allowing selected groups and users to view and modify multiple different asset custom fields across many different catalogs.
Working with Assets
So now that we have all of that configuration done, what can we do? Here are a few scenarios to give you some ideas.
Add Assets to Your Catalogs
To start, staff can now start adding assets to RT allowing you to manage what you have, what state it's in, who currently has it, and when support expires. You could set up an intake process to get new assets added as they come in, and eventually have statuses updated as they are assigned, used, and eventually cycled out.
If you already have an asset database, even something simple like a spreadsheet, you may be able to do an initial bulk import. Best Practical has released RT::Extension::Assets::Import::CSV which is a CSV import tool to help you with this.
Track Assets
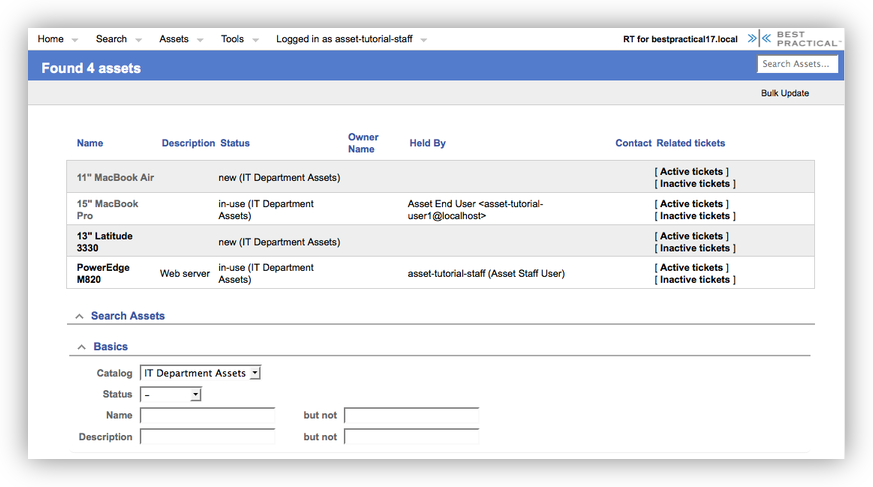
Your staff can now easily track work on assets by linking RT tickets to the assets. Assume you have an issue with an asset, like a server needs a new power supply. Your staff can use the asset search page to find the server. You'll notice that the RT search box is context sensitive, so when you're on an asset page, the search changes to Search Assets and you can search with that as well.
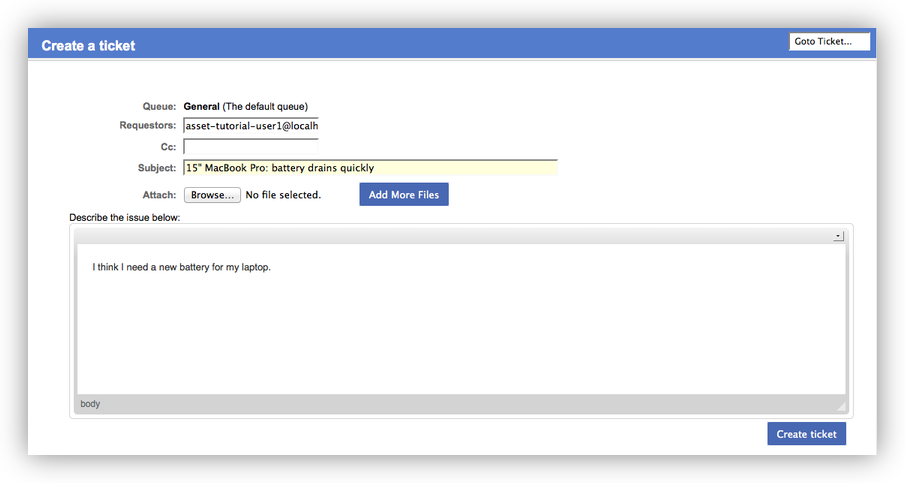
Once you locate the server asset record, in the Actions menu you'll find "Create linked ticket", which does just that. You select the queue and which user to use from the asset as the Requestor, and you land on the ticket create page with some information pre-filled.
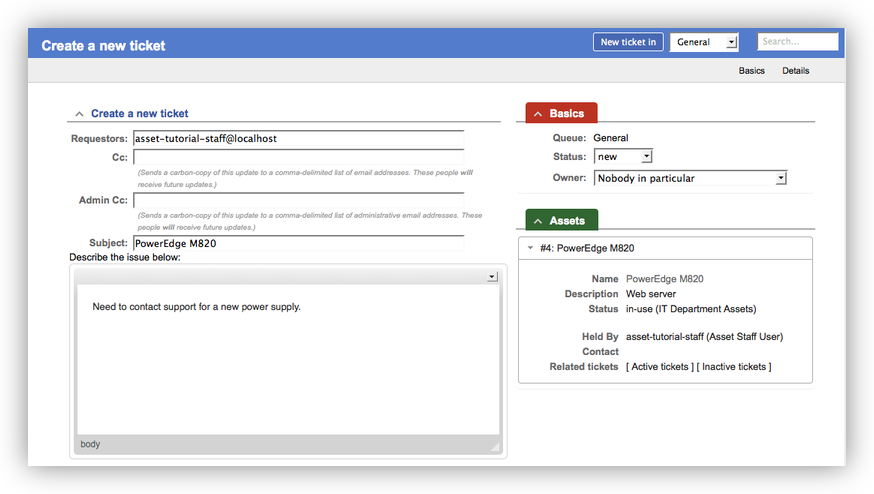
As you can see in the screenshot, when you create a ticket with a linked asset, you get an asset portlet on the create page and on the ticket display page as well. If you navigate back to the asset, you'll see a link back to the ticket in the Links section there. This gives you a record of all the tickets that have been opened against this asset. If this is a common scenario for you, you might even add a custom field on the ticket with the vendor tracking number of the repair. During the repair, you might flip the asset to an 'in-repair' status. Then when the ticket is resolved, flip it back to 'in-use'.
End User Asset Tickets
If an end user contacts us with some problem with their laptop, RT makes it easy to find the correct laptop record and create a ticket for them. Since our support staff do this frequently, they have added the Find User portlet to their RT at a glance page and can quickly search for the user and go to their User Summary page.
We have added the Assigned Assets portlet to the User Summary page, so the laptop is right there on the page when we find the user. We can just click on the asset, then use the "Create linked ticket" action as before to create the new repair ticket.
End User Self Service
Assume we already assign passwords to our unprivileged users so they can use RT's self service interface to submit tickets and they have basic permissions to do so (SeeQueue on the designated queue, CreateTicket, etc.). Since we've given some asset rights to unprivileged users, they can use RT's Self Service interface to find their assets (e.g., laptops, cell phones, etc.) when submitting support requests.
When they log into the self service interface, they will see an Assets menu that takes them to a page displaying assets assigned to them. In our example configuration, this is based on the Held by setting we set when we gave out the laptop. When they navigate to the asset, they will see the Actions menu with the same "Create linked ticket" action our staff uses. When they click on that, they'll end up on the simplified ticket create page for self service. When the ticket is created, the laptop will already be linked to it, saving our staff the work.
Summary
This tutorial is only a quick overview showing how the assets functionality can help you track assets. There are many more features you'll find as you explore the assets interface, like stacking multiple assets on a single ticket, bulk update features similar to tickets, and the search interface. Have fun!
← Back to index